
This page introduces the flow of creating basic animation data in SpriteStudio.
- Description of each window
- Create a new project
- Creating image data
- Create a new Cell map and add new Cells
- Placing Parts
- Save a file
Description of each window
SpriteStudio consists of various window combinations.
For details of each window, please see the following page.
Create a new project
A “sspj (Project Files)” is a file that contains all the information such as animation data, ssce (cell map file), cell lists, and editing information.
This file is used as a reference for creating animations in “OPTPiX SpriteStudio”.
Create a new project (sspj (Project Files))
Select “File” – “New Project” from the menu bar
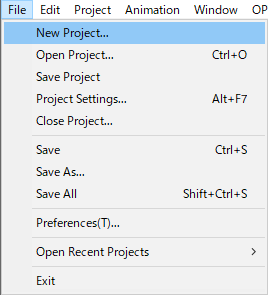 You can create sspj (Project Files) by selecting “New Project” from the menu bar or by pressing the
 ![]() .
.
Specify the folder and file name to save
A window will open where you can specify the folder and file name.
Please specify the folder and file name and click “Save”.
The folder you specify here will be the base folder where all new files created in this project will be saved.
In addition, the file name specified here is displayed as the project name being edited in the title bar at the top of the window.
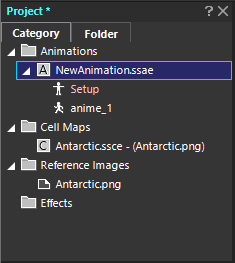
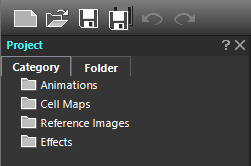 After you have created a new project, the “Animations”,
“Cell Maps”,
“Reference Images”, and
“Effects”
categories are created within the “Category” tab of the project window.
Each item is preceded by a folder icon.
Now you have sspj (Project Files) for creating the animation.
By adding “ssce (cell map file)”, “Cell”, “ssae (Animation File)” and “ssee (Effect files)” to this sspj, you can create and edit animations.
Set “Compatibility” in “Project Settings”
Once you’ve created sspj, before you start creating animation, let’s take a look at “Compatibility“. You can set “compatibility” by selecting “Project Settings” from “File” on the menu bar, opening the “Project Settings” window, and selecting “Compatibility“.
For details, see the page of the “Project Settings Window”.
Creating image data
SpriteStudio requires image data (Texture) to create an animation.
Use image editing software to create image data.
Creates a texture with the pixel size of a power of 2.
SpriteStudio can work with images that are not a power of two, but game engine specifications may not allow this.
You can create more variety of animations with SpriteStudio by drawing and preparing joint and decorative images separately.
| After layout | Used Texture(512×512) |
 |
 |
Related Page
- Divide the illustration into parts(Japanese)
Demonstrates how to split parts when creating textures.
Create a new Cell Map and add new Cells
A “CellMap” is data that contains the “Texture” that SpriteStudio uses to create an animation, and the “Cell” information that SpriteStudio uses to create the animation. The file extension is “.ssce”.
“CellMap” is sometimes referred to as “ssce” in the Help Center.
The cut-out part of an animation from a texture is called a “Cell”.
Assemble your animation by positioning and editing “Cell” as “Parts” in the Layout Window.
Create a new ssce (Cell Map file)
Add ssce to sspj
ssce creates it by reading the image file.
Create or add a new ssce to sspj using one of the following methods.
| Select “Project” – “Add New File” – “Cell Map” on the menu bar. | 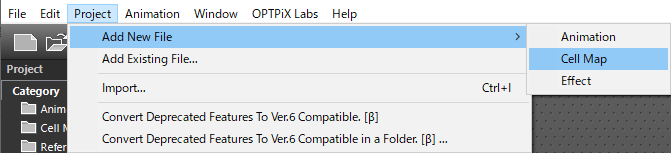 |
| Right-click on the “Cell Maps” in the Project window and select “New File” from the contextual menu. | 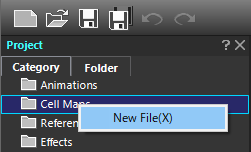 |
|
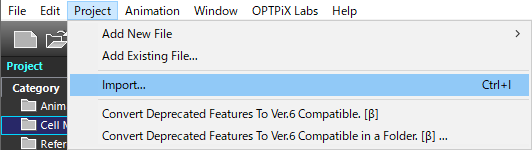
Select “Project” – “Import” on the menu bar. The differences between “Import” and “New File” can be found on the following pages. |
 |
Specify “Reference Image” for ssce
“Reference Image” refers to the “Texture Image” referenced by ssce.
When you create a new ssce, the “Select image file to reference” dialog appears. Specify the texture to use.
Image data that can be imported are “bmp“, “gif“, “jpg“, “psd“, “png“, “pvr“, “tga” and “tif“.
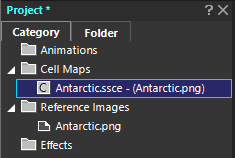 The new ssce is added to the Project Window.
If you use more than one “ssce”, repeat “Create a new ssce” to add more.
You can add a ssce while creating the animation.
Creating and Registering New Cells
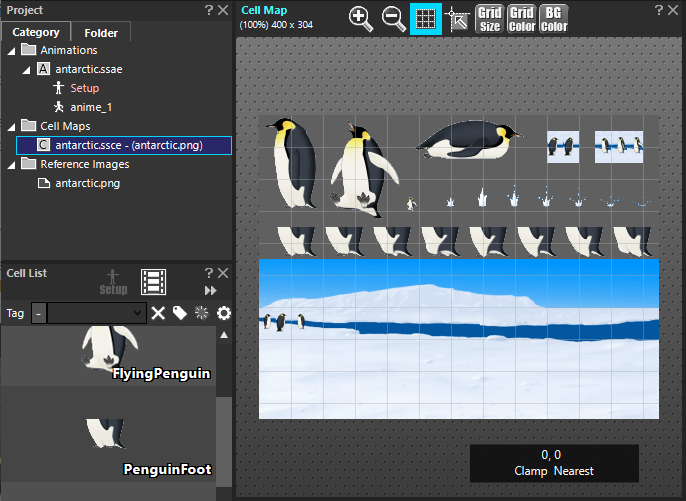
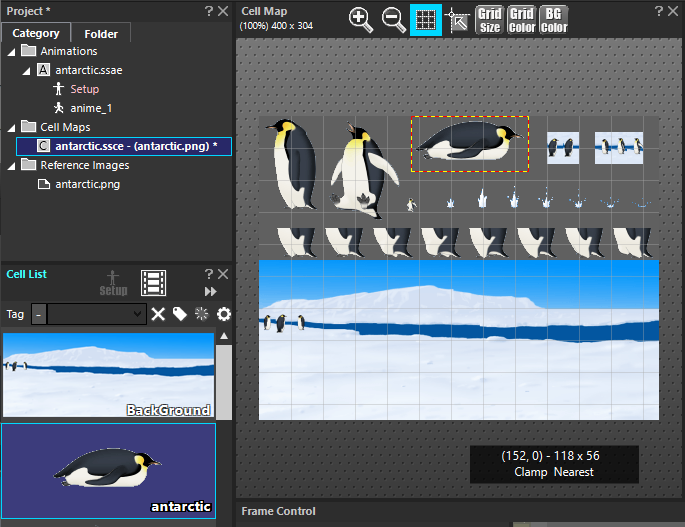
Once you have registered ssce with your project, you can select a range in the Cell Map window and register “Cell” to be used for animation production.
“Cell” is the data from which you place “Parts” in an animation. If you register “Cell”, you will be added to “Cell List”.
“Cell List” data is managed by “Cell Map”.
Select “Cell Map” to switch the display of the Cell List window.
Registering Cells from the Cell Map
From the Project window, select the ssce for which you want to create a “Cell”.
The Cell Map window displays the “Reference Image” associated with the selected ssce.
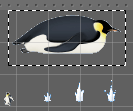 In the Cell Map window, select the rectangle that you want to designate as the “Cell”.
When you finish specifying the range, double-click the range to register the new “Cell” in “Cell List”.
Repeat this process until you have registered all the required “Cell”.
You can rename and set tags from the context menu in the Cell List window.
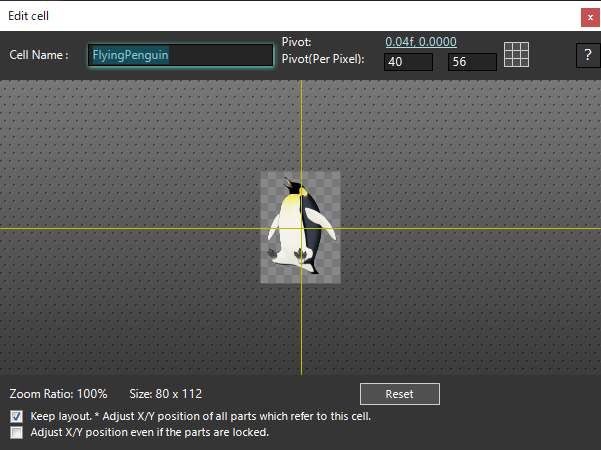
You can open the Edit Cell window by double-clicking “Cell” in the cell list window. In the Edit Cell Window, you can set the “Pivot” on which cells are animated to rotate, scale, or scale.
See here for an explanation of the Edit Cell Window.
Repeat this process to create multiple cells.
You can add cells in the middle of creating an animation.
The following tools are useful for registering cells.
- PSDtoSS6(Japanese)
A tool that generates a set of data for SpriteStudio from PSD.
You can use it for free.- TexturePackerToSS(Japanese)
A tool that allows you to create ssce and texture images from a TexturePacker.
Recommended for people who already use TexturePacker.
About “Pivot” in Cells
The cell has a parameter called “pivot”.
“pivot” is the point about which the parts is placed, scaled, rotated, and so on.
When you create a cell, “pivot” is set to the middle of the parts.
As you create the animation, adjust it to suit your parts usage.
You can set the position of “pivot” in the Edit cell window.
Placing Parts
After creating “ssae (Animation File)”, arrange “Cell” in the Layout Window as “Parts”.
Move this “Parts” to create an animation.
“ssae (Animation File)” is a file containing animation related data (setup data, animation data). The file extension is “.ssae”. This Help Center uses the term “ssae”.
Create ssae (animation file)
First create a new ssae (Animation File) to store the data.
Add ssae to sspj in one of the following ways.
| Select “Project” – “Add New File” – “Animation” on the menu bar. | 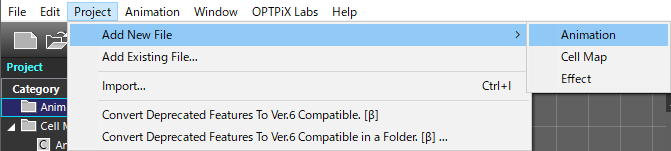 |
| Right-click on the “Animation” in the Project window and select “New File” from the contextual menu. | 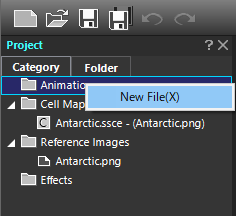 |
The “Create New Animation” window will open. Specify a file name and save.
 The file name you specify is the name that appears in the “Animations” section of the Project window.
Differences Between Setup and Animation Data
When you create ssae, it is called “Setup” and there is always one setup data. “Rename” cannot be done.
“Setup” is the data that is the source of animation data.
“Animation Data” is created based on the data set in “Setup”.
“Animation Data” is data for editing animation. You can change the name.
It can exist multiple times within ssae and is based on “Setup”.
Setting setup data is required when using “Mesh and Bone Features” of “SpriteStudio”. For instructions on creating an animation using “Mesh and Bone Features”, see the following pages.
Setting the Layout Window in the Layout Info Window
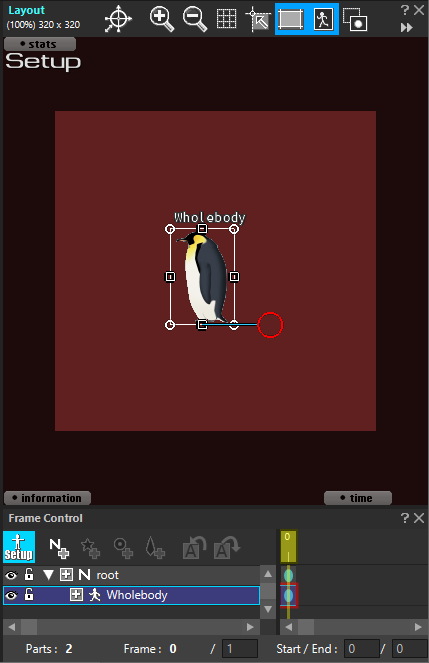
In the Layout Info window, set the size of the “Reference Frame” and the position of the “Origin Point”.
“Reference Frame” is the screen size of the animation to be created.
“Origin Point” sets the location of the “Reference Frame” coordinate (0, 0).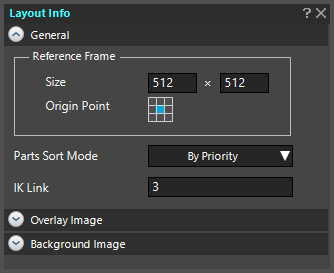
Select setup data to position the parts on the Layout window
Parts can be positioned by selecting the “Cell” used for the animation from the Cell List window and dragging and dropping it into the Layout window.
“Cell” placed in the Layout window are called “Parts”.
|
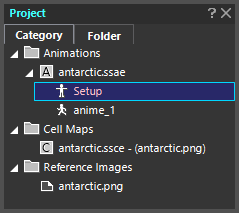
In the Project window, select “Setup”. |
 |
| When the setup data is switched, the background of the layout window turns red, and “Animation” displayed in the upper left of the window changes to “Setup”. | 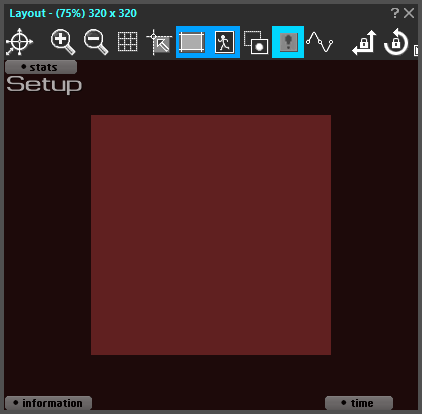 |
| Drag and drop “Cell” from the Cell List window onto the Layout window. | 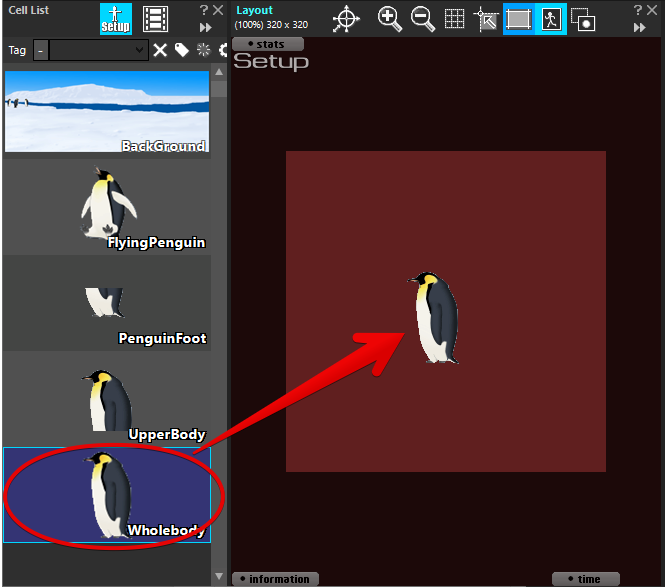 |
| “Part” has been deployed. Repeat this process to position the parts you want to see in the animation. |
 |
Building Parent-Child Relationships for Parts
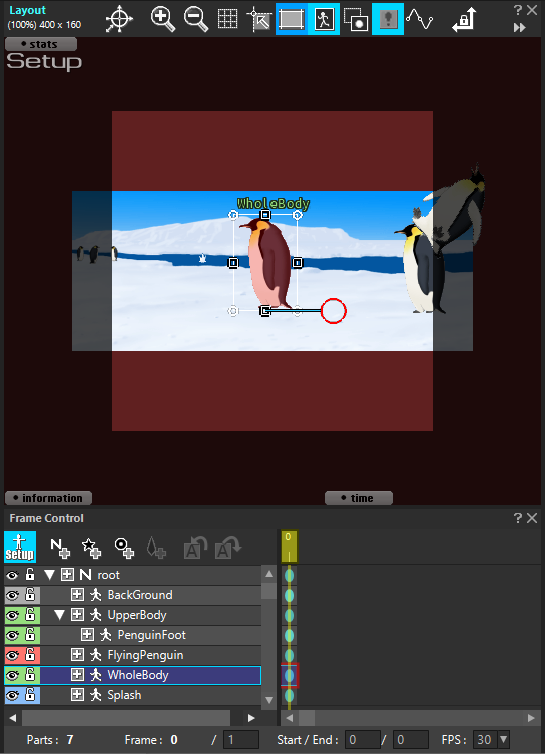
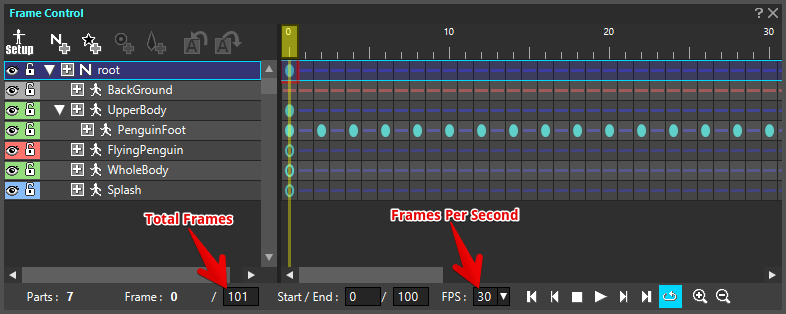
Once you have placed all the parts on the layout window, set the “parent-child relationship” of the parts on the Frame Controls window as desired.
“Parent-Child Relationship” refers to the hierarchical relationship between parts.
A parts that contains other parts is called a “Parent Part”, and a part that contains a parent part is called a “Child Parts”. This relationship is called a “Parent-Child Relationship”.
Editing the parent parts synchronizes the child parts, but the parent part is not affected by edits to the child parts.
For example, in the above figure, the parent parts named “UpperBody” has a parent-child relationship with the part named “PenguinFoot” as a child part.
When you edit “UpperBody”, “PenguinFoot” is synchronously affected by the edit.
To create a Parent-Child Relationship, you can create a Parent-Child Relationship by dragging and dropping the parts you want to be a child on top of the parts you want to be the parent in the Frame Controls window.
To change the Parent-Child Relationship, drag the child parts you want to change to the hierarchy you want to move it to in the Frame Controls window. The border between the parts is highlighted in blue and the parts is placed in that position.
Once you have completed the basic configuration of the parts in the setup data, such as layout, parenting, and so on, switch to animation data to create the animation.
Preparing Animation Data
After preparing the setup data, prepare the animation data.
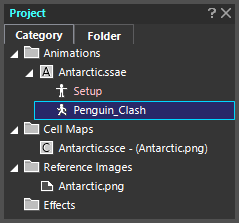 Data that is prefaced with
 ![]() in the Project window is “Animation Data”. You can edit the animation data by selecting this.
in the Project window is “Animation Data”. You can edit the animation data by selecting this.
Animation settings and playback control are available on the toolbar at the bottom of the Frame Controls window.
Here, check and set 2 items.
- Total Frames:Number of animation playback frames
- Frames Per Second:Frames updated per second (fps)
When you are ready to create an animation, save the data.
Save a file
There are two main ways to save files containing data.
How to save only “ssae” or “ssce”
How to save only the selected ssae or ssce.
| In the project window, select the ssae or ssce you want to save, then select “File” – “Save” from the menu bar. | 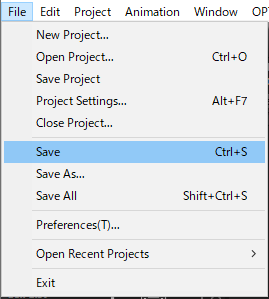 |
| Click the Save icon in the toolbar | |
| Use shortcut keys | + |
How to save the entire sspj
Save all files managed by sspj, including sspj.
| Select “File” – “Save All” from the menu bar. | 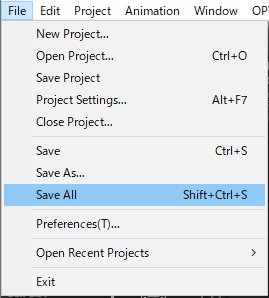 |
| Click the Save All icon in the toolbar | |
| Use shortcut keys | ++ |
Once you have saved the data, you are ready to create the animation in SpriteStudio.
When you are ready to create an animation,…
Edit animation
How to edit the prepared data and create an animation.
Output animation
Provides a summary of how to output and display completed animation data in various formats.