
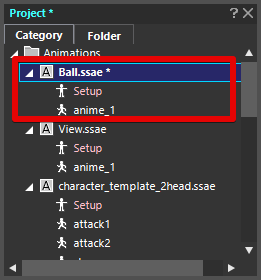
“Create Animation” created a variety of SpriteStudio files to prepare you for creating animations.
This page takes you a little deeper into how animation is edited in SpriteStudio and how it is represented in many ways.
- About Key and Attribute
Explanation of “Key” and “Attribute” that you should know when editing an animation - Interpolate Animation
How to create looping animations. - “Reference Cell” Settings
How to use “Reference Cell” to create an animation in which the eye blink. - “Range Selection” of the frame
How to edit parts together. - Instance Parts
How to work with parts that reference animation information. - Effect Feature
I will introduce the Effect Feature. - Mask Feature
I will introduce the Mask Feature. - Bone Mesh Feature
I will introduce the Bone Mesh Feature.
About Key and Attribute
OPTPiX SpriteStudio creates animation by editing “Key” and “attribute”. “Key” appears at the frame where the attribute (Information describing the state of a parts in a particular frame) is set.
Set this “Key” on a per-parts basis to create the animation.
![]() that appears in the timeline area of the frame controls window indicates “Key”.
that appears in the timeline area of the frame controls window indicates “Key”.
“Key” and “Attribute” are also described on the “frame control window (Japanese)” and “Attribute window (Japanese)” pages. Please take a look at this as well.
Organize “Attribute” for viewing
By default, many “Attribute” appear under the “General” heading in the attribute window.
Select “File” – “Project Settings” from the menu bar to open the Project Settings window. You can also show only the attributes you want by selecting “Custom” under “Playback target platform” under “compatibility”.
For details, see “About Attribute display settings“.
Note: The “Misc” item in the Project Settings window lets you select which attributes are automatically enabled when you set key. If you hide an attribute checked with this setting, you cannot change the value of the attribute.
Interpolate Animation
SpriteStudio sets the parameters for each attribute in frames as “Key”. The parameters are automatically computed and applied for the frames between the key.
This method of animation is called “Interpolate Animation”.
Create looping animations with interpolated animation
SpriteStudio makes it easy to create looping animations. As an example, I’ll show you how to create a “to wave one’s arm” animation.
|
The parts were arranged in the layout window, and the parent-child relationships of the parts and the “Priority (attribute)” of each part were set. Add key from here and edit attributes to create looped animation. |
 |
|
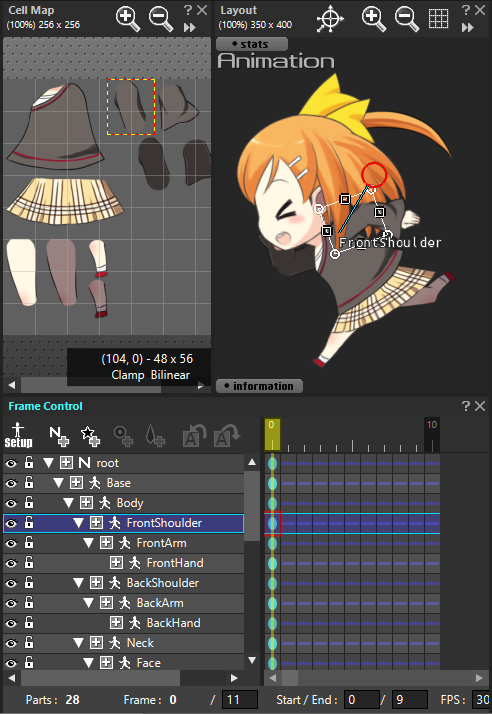
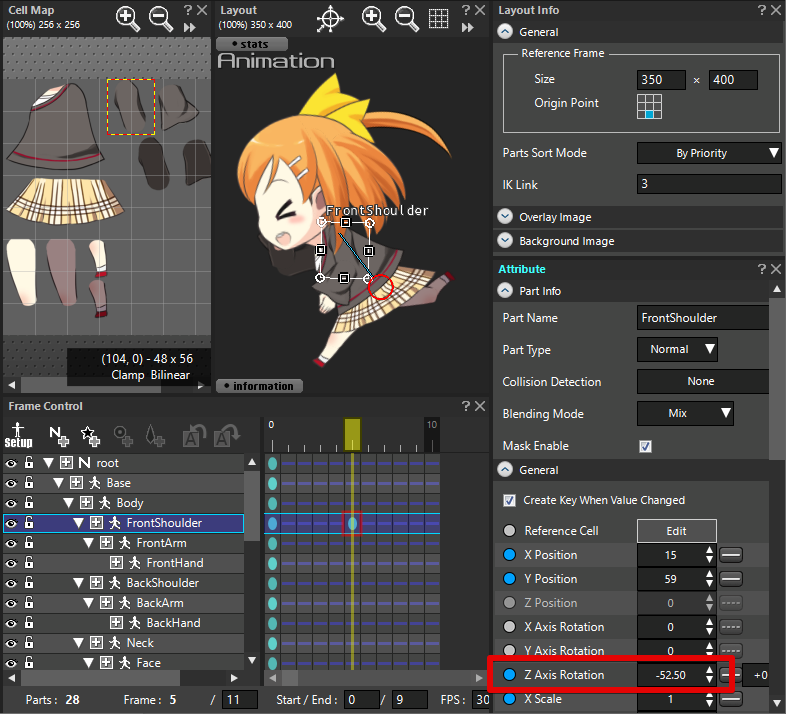
You selected a parts “FrontShoulder” in the Frame Controls window, then selected frame 5 of the Timeline to place a key. You can set key by selecting “Add Key” in the Frame Controls window context menu, editing parts in the Layout window, or double-clicking on the Frame controls. This time you have edited the attribute “Rotate Z” to set the angle for the “front shoulder” parts. |
 |
|
Next, duplicate the Key. This time, you’ll duplicate the Key from frame 1 to frame 10. The “to wave one’s arm” loop animation is now complete. “Paste” has “Paste (Insert)” in addition to “Paste (Overwrite)”. |
|
If you do not set the “Priority” of the attribute, the hierarchy of parts placed in the frame controls determines the display order. The parts at the bottom is displayed in front.
When setting the “Parent-Child Relationship” of a Parts or when there is a clear display order for each Parta, be sure to set “Priority”.
If “Priority” is not set and viewed in a game engine such as Unity, the Parts may not match the “OPTPiX SpriteStudio” display.
When handling data in other environments, be sure to set “Priority”.
Edit interpolation methods in “Curve Editor”
You can vary the movement of your animation using “Curve Editor”.
Press ![]() in the attribute window to display the “Curve Editor” window.
in the attribute window to display the “Curve Editor” window.
The default interpolation method is “Alignment”, which interpolates an animation at a constant change.
See the following pages for more information about the Curve Editor and interpolation methods.
- “Curve Editor” window (Japanese)
Describes the function of the curve editor window. - How to set up interpolation and the difference between each interpolation (Japanese)
Describes how to set up interpolation and how different interpolation can affect your animation. - Tips for creating character animation (Japanese)
This section describes the key points of creating animated characters by using actual animations.
“Reference Cell” Settings
The “Reference Cell” attribute lets you modify the cells referenced by a parts to create an animation in a frame-by-frame fashion.
Create eye blink animation using the attribute “Reference Cell”
You can use “Reference Cell” to create “eye blink” animations, for example.
How to create an animation using a pattern of eye changes.
|
Place the parts in the layout window. |
 |
|
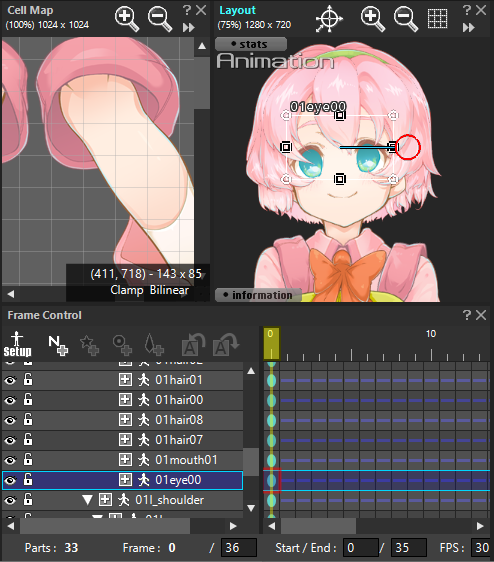
Select the pupil part in the frame control window. Then select the frame where you want to change the eye pattern. |
 |
|
Select “Edit” under the “Reference Cell” item in the attribute window. |
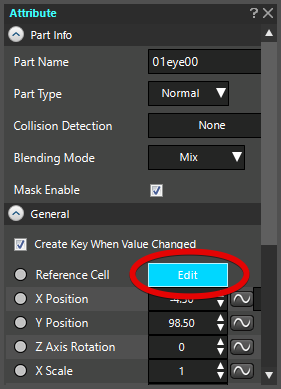 |
|
In the “Select reference cell” dialog that appears, select the cell you want to change. |
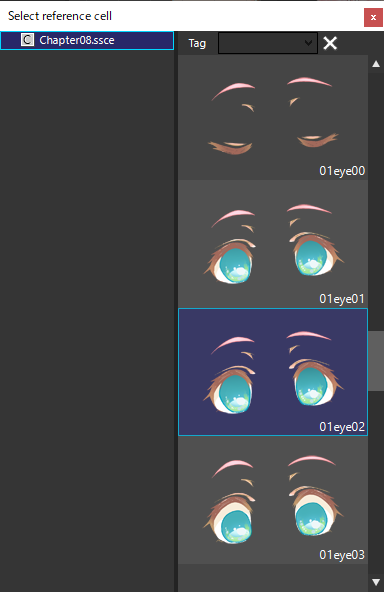 |
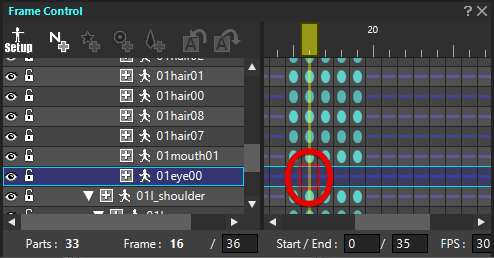
When “Reference Cell” is set, the circle next to the name turns blue. Since you are creating a “eye blink” animation this time, set “Reference Cell” so that it switches to “a closed picture of the eyelids” after “a picture with open eyelids”. |
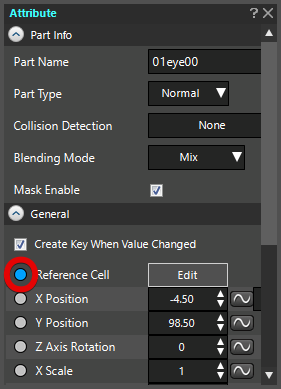 |
| Sets the last frame to the “a painting with open eyelids” cell set in the first frame. This completes the looping animation of “eye blink”. |
 |
“Range Selection” of the frame
An introduction to the ability to edit in bulk by selecting a range of frames.
“Range Selection” is useful when you have more parts or frames and have difficulty adjusting frame by frame.
![]()
In the Frame Controls window at the “ruler part” position, drag “ + click” to the start and end frames you want. This highlights the specified range in yellow.
If you edit the part in this state, the keys at the selected frame are manipulated in bulk and the animation reflects the changes.
Also, if you play while “Range Selection”, only the “Range Selection” frames will be played. This is useful when you want to play and see a portion of a long animation.
![]() To cancel “Range Selection”, right-click “ruler part” and select “Clear Playback Range” from the context menu.
To cancel “Range Selection”, right-click “ruler part” and select “Clear Playback Range” from the context menu.
Instance Parts
An Instance Parts is a Parts that has a special behavior called “Referencing an Animation”.
This function is very useful when you want to animation multiple characters with different animation contents separately.
This section describes the basic usage of “Instance Parts”.
Please refer to the following page for details on “Instance Parts”.
- Using the Instance Feature (Japanese)
This page describes the instance features, including “Instance Parts”.
Creating an Animation Using “Instance Parts”
Create animation data referenced by “Instance Parts”
A “Instance Parts” is a part that references animation data.
To use it, you must create the animation data you want to reference.
The procedure for creating animation data is the same as for creating a normal ssae (Animation File).
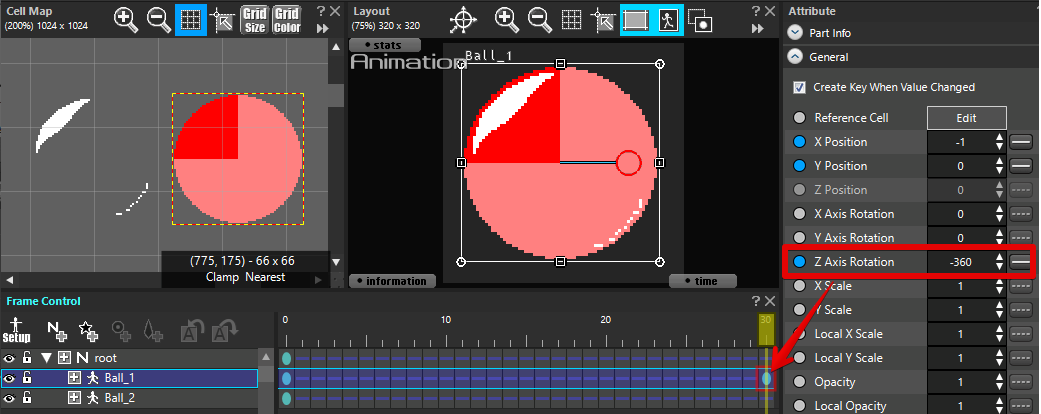
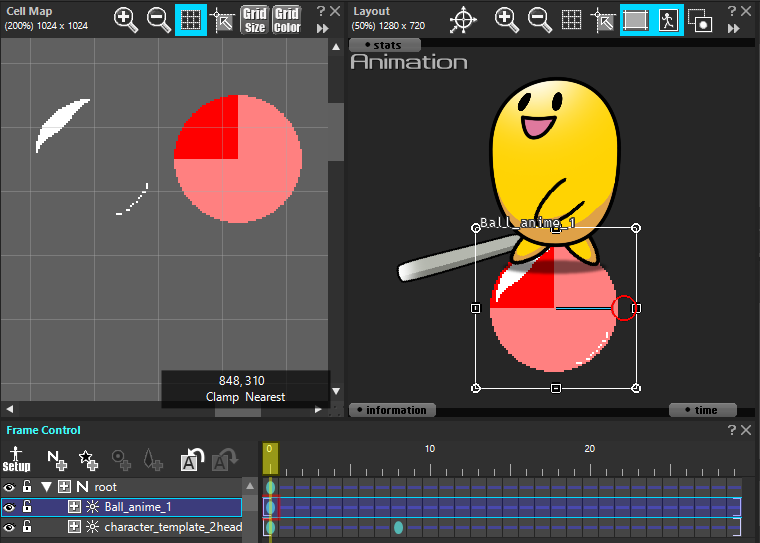
This time, you will create an animation that incorporates the animation of a spinning ball and the animation of a character walking as a “Instance Parts”.
|
Add a new ssae (Animation File). |
 |
| Create an animation of the spinning ball. By setting the Z rotation parameter to -360 at the last frame, you created an animation of 1 rotation to the left. |
 |
Create animations using “Instance Parts”
Position the rotated ball animation as a “Instance Parts” in your animation.
|
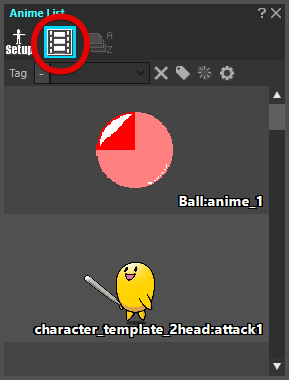
Select the animation data you want “Instance Parts” to position. |
 |
|
Click |
 |
|
Drag from “Anime List” to place just as you would place a cell. |
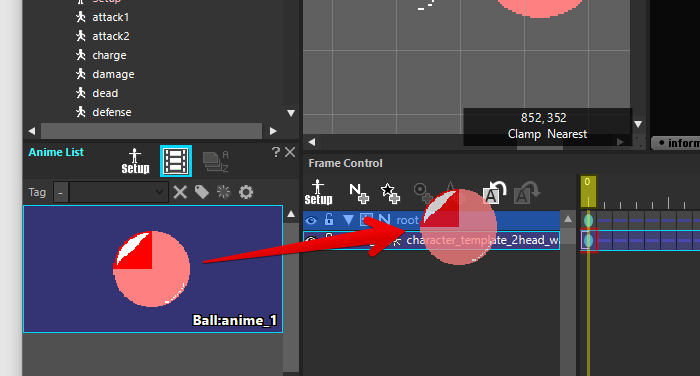 |
| You have positioned the animation of the spinning ball as a “Instance Part”. Animations of characters walking are also arranged as “Instance Part”. Adjust the position, priority, and other attributes of each “Instance Part” you placed to complete the animation. |
 |
“Instance Parts” is a special part that can be modified like a Normal Parts.
You can use animation data as a “Instance Parts” and set its “Instance Parts” to various attributes to achieve different effects.
Effect Feature
You can create an animation of a parts with random element movement, such as a particle effect, using the Effects feature.
Animation data created using the Effects Feature is saved in a file called “ssee (Effect files)”.
Once you have created an ssee, you can incorporate it into your animation data as a “Effect Parts”.
Related page of the Effect Feature
- Effect Editor window (Japanese)
Provides detailed descriptions of the functions in the “Effects Editor” window. - Using the Effect Feature (Japanese)
Describes how to use the Effect Feature. - Effect Samples Descriptions (Japanese)
Describes the particle effect sample data provided with “Ver.5 Download page” (Japanese). The data was created in SpriteStudio 5, but is also available in SpriteStudio ver.6.
Mask Feature
You can use “Mask Parts” to mask an animation so that parts of it are obscured.
Related page of the Mask Feature
- Using the Mask Feature (Japanese)
Describes how to use the Mask Feature when creating animations. - SpriteStudio Ver.6 Application Example “Tenohira no Bōken” (Japanese)
It introduces short films that use the Mask Feature and explains how to use the mask function.
Bone Mesh Feature
You can use the Bone Mesh Feature in creating animation. It is possible to express the soft movement such as the way the cloth or hair is waving.
Related page of the Bone Mesh Feature
- Using the Bone Mesh Feature (Japanese)
How to create animation using the Bone Mesh Feature. - Mesh Editor window (Japanese)
Describes creating and editing mesh cells “Mesh Editor Window”. - SpriteStudio Ver.6 Application Example “Tenohira no Bōken (Japanese)
It introduces short films that use the Bone Mesh Feature and explains how to use the mask function.
When you finish editing the animation…
Output animation
Provides a summary of how to output and display completed animation data in various formats.