
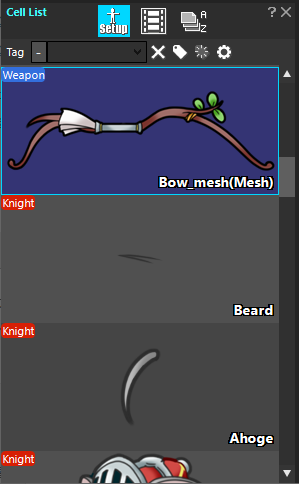
 Cell List Window is a window that lists each Cell cut from the selected Cell Map in the Project Window.
Operations in this window are described in the following sections.
- Cell List
- Anime List
- Related Pages
Operation By Toolbar
![]() The Cell List Window toolbar allows you to switch the data to be edited and the list to be displayed.
The Cell List Window toolbar allows you to switch the data to be edited and the list to be displayed.
Toggle Setup/Animation Data |
Switch between Setup and Animation Data for the data you want to edit. Bone Mesh Feature operations such as Edit Mesh and Unmesh can only be performed using the Setup Data. |
|---|---|
|
Change List Type |
Switches between a Cell List and an Animation List. |
Sort |
Sorts the cell list by cell name from A to Z. |
If you narrow the window so that the toolbar cannot be displayed, a ![]() mark appears at the right end of the toolbar. Click this mark to open a menu list of buttons that are not visible. Select this menu to perform the function of each button.
mark appears at the right end of the toolbar. Click this mark to open a menu list of buttons that are not visible. Select this menu to perform the function of each button.
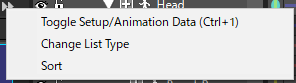 The menu image is for when all buttons are hidden. The actual menu displays only the hidden buttons.
Operation on Cell List
| + Click |
Select all Cells in the range you clicked. Click the first and last Cells in the range that you want to select. |
|---|---|
| + / |
Selects all Cells to which the cursor has moved. |
| + Click | Select or deselect the Cell that you click. |
| + | Selects all Cells. |
| alphanumeric key |
Select the Cell whose name begins with the key you typed. |
Add Parts to Animation Data
Provides step-by-step instructions on how to add Cell in a Cell List as Parts to animation data that you are editing.
- In Frame Control Window, click the Parts you want to be the Parent Parts.
- Select the Cell registered in Cell List Window and drag and drop it into Layout Window.
Refer to the linked page below to adjust the Parts after it has been added.
- Edit animation
How to edit the prepared data and create an animation.
Edit Cell
Double-click a Cell in the Cell List to open Edit Cell Window where you can change the cell settings.
Refer to the following linked page for the Edit Cell Window.
- Edit Cell Window
Describes the features of the Edit Cell Window.
Edit Mesh
Mesh Edit prepares and edits Mesh Cell for use with Mesh Parts.
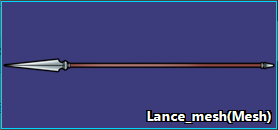
How to turn a cell into a Mesh Cell. With the Setup Data selected, select Edit Mesh from the Cell’s context menu. The Mesh Editor Window will open and change to Mesh Cell by setting the vertex and setting the data. Mesh Cell are indicated by (Mesh) after the cell name.
For more information about the Mesh Editor Window and Bone Mesh Feature, please refer to the linked page below.
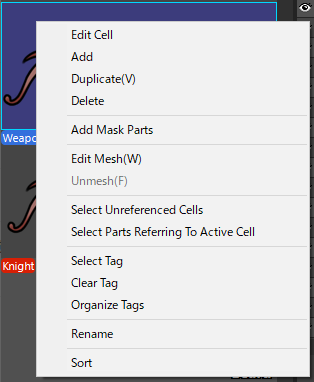
Context Menu of Cells inside List
Right-click a Cell in the Cell List to open the context menu.
| Edit Cell |
The Edit Cell Window opens. Edit cells. |
|---|---|
| Add |
Adds a new Cell. When you enter a name, the new Cell is added to the Cell List. |
| Duplicate |
Duplicate the selected Cell. |
| Delete | Deletes the selected Cell. |
| Add Mask Parts | Adds a Mask Parts that uses the selected Cell as a Reference Cell. |
| Edit Mesh |
Opens the Mesh Editor Window. Edit vertex settings for Mesh Cell. Cell become Mesh Cell by setting vertices.If you cannot select a menu, check that the following settings are set.
|
| Unmesh |
Changes a Mesh Cell to a regular Cell. Note that vertex data set in Mesh Cell is discarded. |
| Select Unreferenced Cells |
Select a Cell that is not used in the Parts. Use this function to find unnecessary Cells. |
| Select Parts Referring To Active Cell |
Changes the part using the selected cell to selected. If the selected cell is not used in the animation data you are editing, a dialog is displayed informing you that it is not used. |
| Select Tag |
Open the Select Cell Tag Dialog. Sets the Tag for the selected Cell. |
| Clear Tag |
Removes all Tags from the selected Cell. |
| Organize Tags |
Open the Organize Cell Tags Dialog. Edit and manage Tags. |
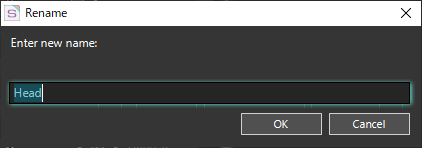
| Rename |
Rename a cell. The Rename Dialog will open, allowing you to specify a new name. |
| Sort |
Sorts the cell list by cell name from A to Z. This function is the same as “Sort” on the Toolbar. |
About Tags
![]() Cells can be tagged.
Cells can be tagged.
By using “Tag Filter”, you can narrow down the Cells on the Cell List.
This function is useful when a large number of Cells are registered.
Tag functionality is only available for Cell List.
You cannot set tags in Anime List.
How to Operation on Tag
|
specified input field of the Tag Filter |
Refine the Cells on the Cell List by specifying a Tag.
|
|---|---|
|
|
Clears the Tag filter specification and displays all Cells. |
Select Tag |
Open the Select Cell Tag Dialog. Select the Tag to display in the selected Cell. |
|
|
Remove all Tags from the selected Cells. |
|
Organize Tags |
Open the Organize Cell Tags Dialog. |

Select Cell Tag Dialog
Dialog box for setting the Tag to display for the selected Cell.
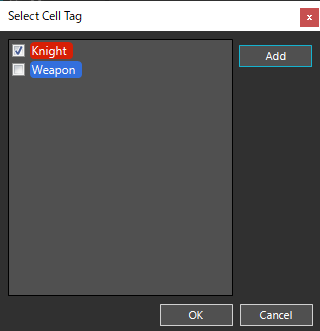
Tag specification field
A list of Tags appears.
Sets the checked Tag to the selected Cell.
Add
Open the Edit Cell Tag Dialog.
New Tag can be added.
OK
Sets the checked Tag to the selected Cell.
Cancel
Close the Select Cell Tag Dialog.
The Tag settings remain unchanged.
Organize Cell Tags Dialog
Dialog box for adding, editing, and deleting Tags.
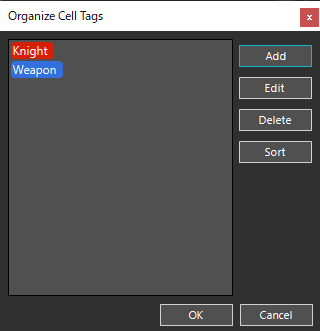
Tag specification field
Select the Tag you want to edit.
Add
Open the Edit Cell Tag Dialog.
New Tag can be added.
Edit
Open the Edit Cell Tag Dialog.
Edit the selected Tag in the Tag specification field.
Delete
Deletes the selected Tag in the Tag specification field.
Sort
Sort Tags from A to Z.
OK
Save edits to the Tag and closes the dialog.
Cancel
Closes the dialog without saving any Tag edits.
Edit Cell Tag Dialog
Dialog for adding and editing Tags.
You can set the Tag name and color.
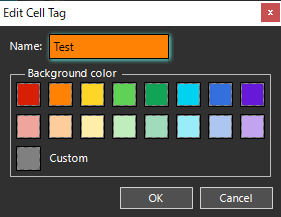
Name
Sets the Tag name.
Any string can be up to 16 characters long.
Background color
Sets the color of the tag.
Selecting a colored rectangle changes the color of the tag.
If you register a tag without selecting it, gray color is set.
If you choose Custom, a color picker appears and you can choose any color.
OK
Save edits to the Tag and closes the dialog.
Cancel
Closes the dialog without saving any Tag edits.
Operation on Anime List
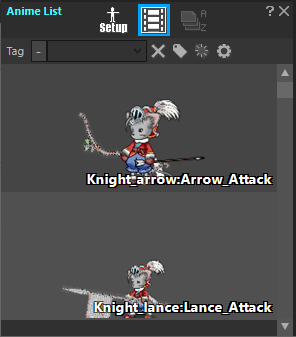 The animation list displays animation data other than the currently selected ssae (Animation Files).
You can drag any animation data from the Anime List into the Layout Window to incorporate it as an Instance Parts into the animation you are editing.
Please refer to the linked explanation for Instance Parts.
Related Pages
- Edit Cell Window
Describes the features of the Edit Cell Window.