
The “Cell Map” is the texture that is used for creating animations. By dividing this Cell Map small into the parts’ area and registering into the “Cell List”, the “Cell” within the “Cell List” becomes actual animation parts.
- The Cell Map can be created by reading-in the image file. By either of the following methods, the Cell Map can be read-into the Project.
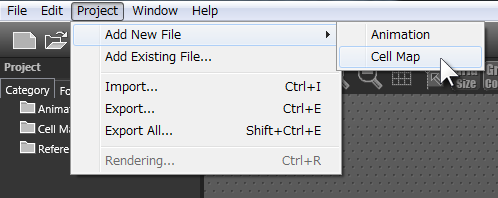
- To select [Project]-[Add New File]-[Cell Map] from the upper menu bar
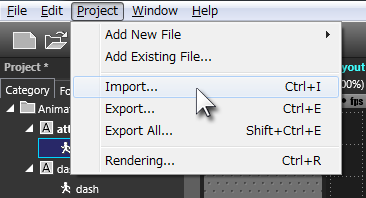
- To select [Project]-[Import] from the upper menu bar
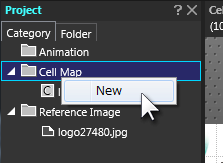
- To select [New] of the Cell Map of the “Project” window with the right click
- To select [Project]-[Add New File]-[Cell Map] from the upper menu bar
- The window opens for selecting the texture that is used as Cell Map. Choose the image file. The readable kinds of the image file are: bmp, gif, jpg, psd, png, pvr, tga, tif.
To be noted, “when choosing [Project]-[Import] from the upper menu bar” at 1., the ssax file also appears as an optional object.
* If the ssax file is selected herein, the ssax file is imported.
- The window will open to newly create the cell map.
 The filename selected herein will become the cell map name which is displayed in the “Project” window “Category” tab “Cell Map”. In principle, it is recommended to store the cell map into the same folder as the Project. But it is also possible to store it into a sub-folder, etc. under the Project Folder.
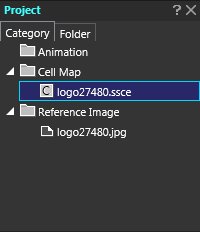
 - A new Cell Map will be added to the Project.
When the animation uses plural cell maps, repeat the 1. to 3. procedure and define the plural image files as the reference image. This reference image adding work can be done during the creation of animation.