
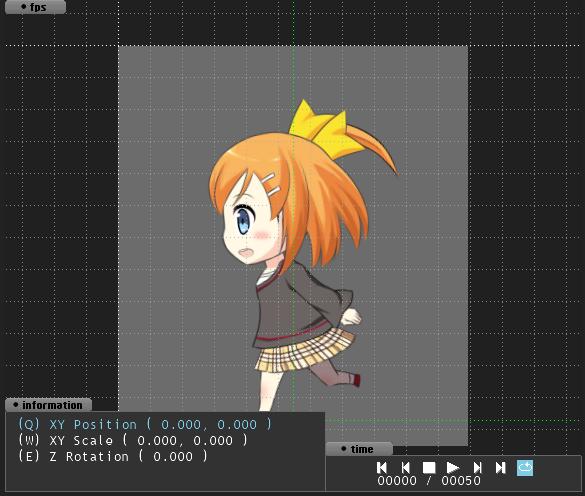
The “Layout” window is the window to show the state of the currently-working animation.
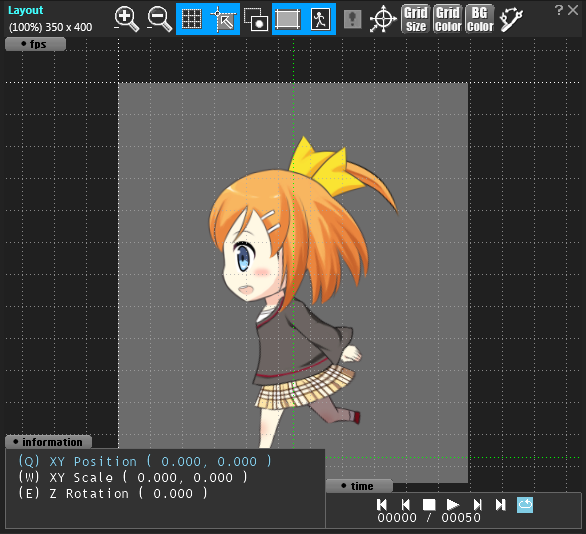
This window is largely comprised of two parts.
Toolbar
On the toolbar of the layout window, accommodated buttons are mainly for changing the state of the layout window’s image display.
![]()
| It enlarges the image and shows. The image can be enlarged up to 1600%. | |
| It reduces the image and shows. The image can be reduced down to 25%. | |
| It switches Show/Hide of the grid of the image display part. When the button’s background color is blue, Show. When it is gray, Hide. With every click, this display switches alternately. | |
| When the Specified Range and the Rectangle are moved, it snaps them to Grid. When the button’s background color is blue, Snap to Grid. When gray, Not Snap to Grid. The state is switched alternately by clicking the button. Also, even when the grid is not shown, it is possible to snap (meaning that it is separate from the grid’s shown state). | |
| It switches Show/Hide of other parts than selected currently, only in the outline frame. When the button’s background color is blue, Show in Outline Frame. When gray, Display by Pattern Design. The display switches with every click of the button. | |
| It switches Show/Hide of the reference frame set by the layout information. When the button’s background color is blue, Show. When it is gray, Hide. With every click, this display switches alternately. | |
| It shows the focus frame (i.e., simple deformation-operating handle) in the currently-selected parts. When the button’s background color is blue, Show. When it is gray, Hide. With every click, this display switches alternately. To be noted, the herein-said “simple deformation operating handle” is meant that “display (show) is simpler”, compared with the “Gizmo”. | |
| It shows the collision detection area that is set with the group of parts. The collision detection area is shown in the translucent color. When the button’s background color is blue, the collision detection frame is shown. When it is gray, Hide. With every click, the display switches alternately. When it is gray, it is not shown. | |
|
The Gizmo is shown, taking the origin point of the currently-selected parts as its central position. By dragging the arrow mark (triangular part) located at the cruciform spearhead, the translation of Up/Down and Right/Left of parts is enabled. By dragging the round mark located at the cruciform spearhead, the Zoom/Reduce of Up/Down and Right/Left of parts is enabled. By dragging the left-lower slant arrow mark (triangles at both edges, the Zoom/Reduce is possible, maintaining the aspect ratio as is). By dragging the circle located as if winding the cruciform, it is possible to rotate parts. |
|
|
It changes pixel intervals of the grid. The dialog setting for input of grid’s pixel intervals will open. So, input pixel intervals with the positive number therein.
|
|
| It changes the color of the grid line. With a click of the button, the color picker is show. So, specify the color therein. | |
| It changes the background color of the image display part. With a click of the button, the color picker is show. So, specify the color therein. The background color will change. | |
|
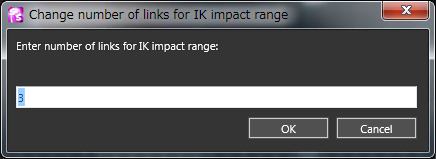
In case of operating the pseudo-IK (inverse kinematics), it specifies, with the positive number, parent parts of how many stages to be affected.
|
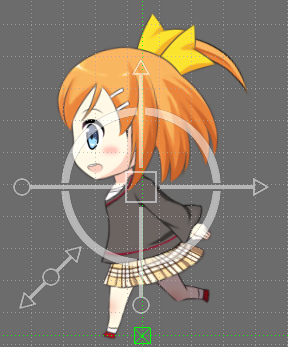 It shows the Gizmo (Operating handle) which is used to operate parts. When the button’s background color is blue, Gizmo is shown. When it is gray, Hide. With every click, the display switches alternately.
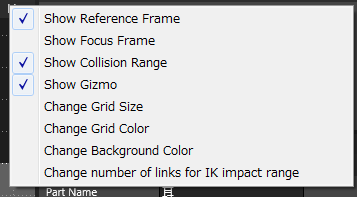 Also, when the whole cannot be shown such as the window’s breadth is too narrow, the two-triangle mark
 ![]() is shown at the right side of the toolbar. By clicking this mark, the menu of the hidden buttons will open. By selecting from this menu, functions of the respective buttons can be implemented.
is shown at the right side of the toolbar. By clicking this mark, the menu of the hidden buttons will open. By selecting from this menu, functions of the respective buttons can be implemented.
The above figure is the menu of all the hidden buttons. In actual case, only the hidden buttons are shown.
Image Display Part
In the image display part, animation’s parts (cell) can be selected directly, and the settings of Move/Rotation/Zoom/Reduce, etc. can be done intuitively.
The following are the basic operations of the image display part.
Basic Operation
Select Parts
By clicking the parts shown, it is possible to make the there-existing parts at the selected state.
Select Plural Parts
By repeating CTRL+Click, the parts existing there can be selected in addition to the selected parts until then.
Select Plural Parts inside Area
When the range is selected in the image display part, parts existing in the range can all be selected at a time.
Move Display Range
With Space Key+Drag, the area displayed can be moved.
Operation of Selected Parts
With the parts selected by the basic operation, the following operations are possible. The results will be reflected upon the frame position shown on “Frame Control Window” of the selected parts.
Move, Deformation, etc.
By dragging parts, the Move of parts is enabled, and by gripping and dragging the four corners and the edge of parts (i.e., spots where the mouse cursor changes to the up-and-down and right-and-left arrows), the deformation is enabled. When the frames of Gizmo and Focus are displayed, the Deformation and Move are enabled by using these available functions.
Simple IK Operation
With ALT+dragging at the parts’ selected state, the Move is possible in conjunction with the parent parts having the inheritance relation at “Simple IK (inverse kinetics)”.
Parts’ Right Click Menu
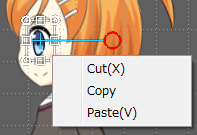 With right click of the selected parts, the exclusive-use menu will open.
| Cut | It deletes the currently selected parts and its child parts after copying them to the clipboard. |
|---|---|
| Copy | It copies the currently selected parts and its child parts to the clipboard. |
| Paste | It adds the “Cut” or “Copy” parts to the new layout window. |
Show/Play of Animation Information
By clicking the long buttons located at the four corners of the image display part, it can open and close the small window which shows and plays the information of the currently-working animation.
| fps | It shows the present FPS during playing animation. |
|---|---|
| information | It shows attributes related to coordinates and sizes of the selected parts. |
| time | The buttons related to the play of animation are accommodated, same as those located on the toolbar of the lower part of the Frame Control Window. |
Note:In order to operate the NULL parts on the layout window, start after showing the Gizmo or Focus frame. When the click on the layout window is implemented, the parts located at the cursor position on the layout window is automatically selected. So, a care must be taken.