Legend (symbols) : SD=Smart & Device / DBC=Digital Broadcast
Basic Functions
SDDBC
Color reduction to PNG8 format with alpha transparency
- Open the image.
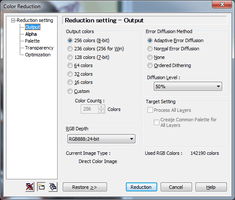
- Select [Image] > [Color Reduction] from the menu.
- Select [Reduction setting] > [Output] and change the settings according to the usage.
- For images preserving the alpha channel, select [Reduction setting]
> [Alpha], then check “Color Reduction with Alpha Channel.” Adjust the other items as necessary.
- Click the [Reduction] button to start execution.
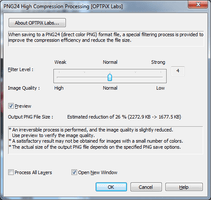
Further compressing PNG file sizes SD
Convert to high quality PVRTC format
- Open the image.
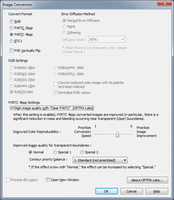
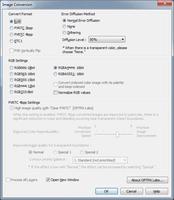
- Select [Image] > [Image Conversion] from the menu.
- Select PVRTC 4bpp in “Convert Format.”
* Note: When using Unity, be sure to check “PVR Vertically Flip”.
- The lower “PVRTC 4bpp Settings” level becomes active, so check “High image quality with Clear PVRTC.”
- Adjust the “Improved Color Reproducibility” slider to match the priorities for image quality and processing speed.
- Change “Improved image quality for transparent boundaries” as necessary according to the usage.
- Click on the “OK” button to start execution.
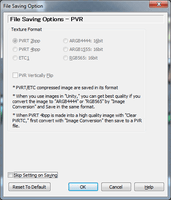
- Saves in the PVR format. No conversion is necessary since PVRT 4bpp was selected in the save settings from the start.

