
 To start EXEpress Compressor with EXEpress 6, select [Archive] > [Create New Archive File] from the main menu.
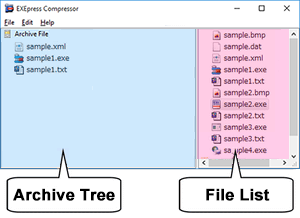
You can select a file to add to the archive by selecting the file or folder from the “File List” on the right side of the screen, and dragging it to the “Archive Tree” on the left side.
Files and folders can also be added to the archive tree from Explorer.
After selecting files to add to the archive, create the archive file by selecting [File] > [Save Archive File as] or [File] > [Create Archive File and Exit] from the main menu.
EXEpress Compressor can be started directly from the Windows Start Menu.
In this case, [File] > [Create Archive File and Exit] cannot be used.
Main menu
The main menu is displayed at the top of the window.
[File] menu
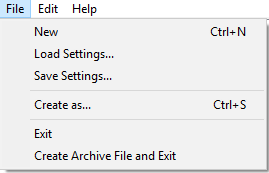 The archive file is created from the [File] menu.
| New |
Clears the content of the archive tree. |
|---|---|
| Load Settings |
Load the saved “file information to register in the archive tree.” |
| Save Settings |
Saves the “file information to register in the archive tree” in a file. The extension is “*.epc.” |
| Create as… |
Save the archive file as |
| Exit |
Exit create archive file |
| Creates an archive file and Exit. |
Creates an archive file with the archive tree content and then exits EXEpress Compressor. The archive filename is assigned by EXEpress Compressor.
* This item is unavailable when EXEpress Compressor is started directly from the Windows Start Menu.
|
[Edit] menu
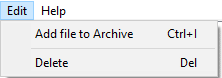 The [Edit] menu performs archive tree operations.
| Add file to Archive |
Items currently selected in the file list are added to the archive tree.
|
|---|---|
| Delete |
Items selected in the archive tree are deleted from the tree. |
[Help] menu
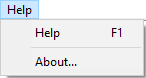 The [Help] menu displays this help file.
| Help |
Open OPTPiX Help Center in browser |
|---|---|
| About… | Display the version of EXEpress Compressor. |