
STEP. 1
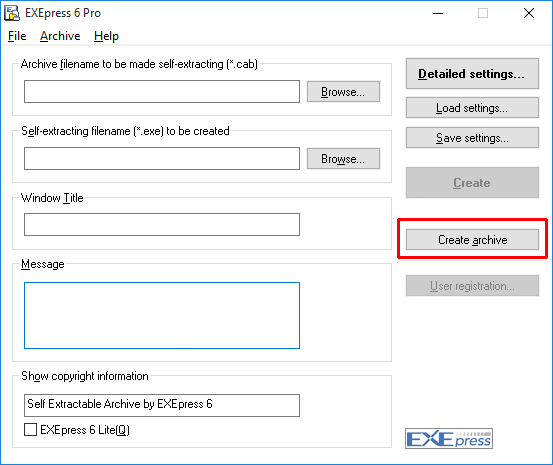 To start the archive file creation tool (EXEpress Compressor) bundled with EXEpress 6, start EXEpress 6 and then click on the “Create Archive” button on the right of the main window.
STEP. 2
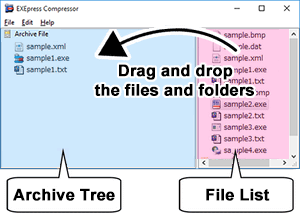 Drag and drop the files and folders to add to the archive from the “file list” on the right of the window to the “Archive Tree” on the left side of the window. (Can also drag and drop from Explorer)
STEP. 3
After the archive tree is completed, select [File] > [Create Archive File and Exit] from the Main Menu.
STEP. 4
The EXEpress Compressor window closes, and the created archive file is automatically entered into the EXEpress 6 “Name of archive file to be self extracted.”
STEP. 5
The self-extracting executable file with the name [Name of self-extracting executable file to be created] is created by clicking on the “Create” button. Run the created self-extracting executable file to verify that the program executes as intended.
To use the various EXEpress 6 functions click on the [Detailed Settings] button. See after “EXEpress 6 Main Window” for details on usage.